Your Business, Your Choice
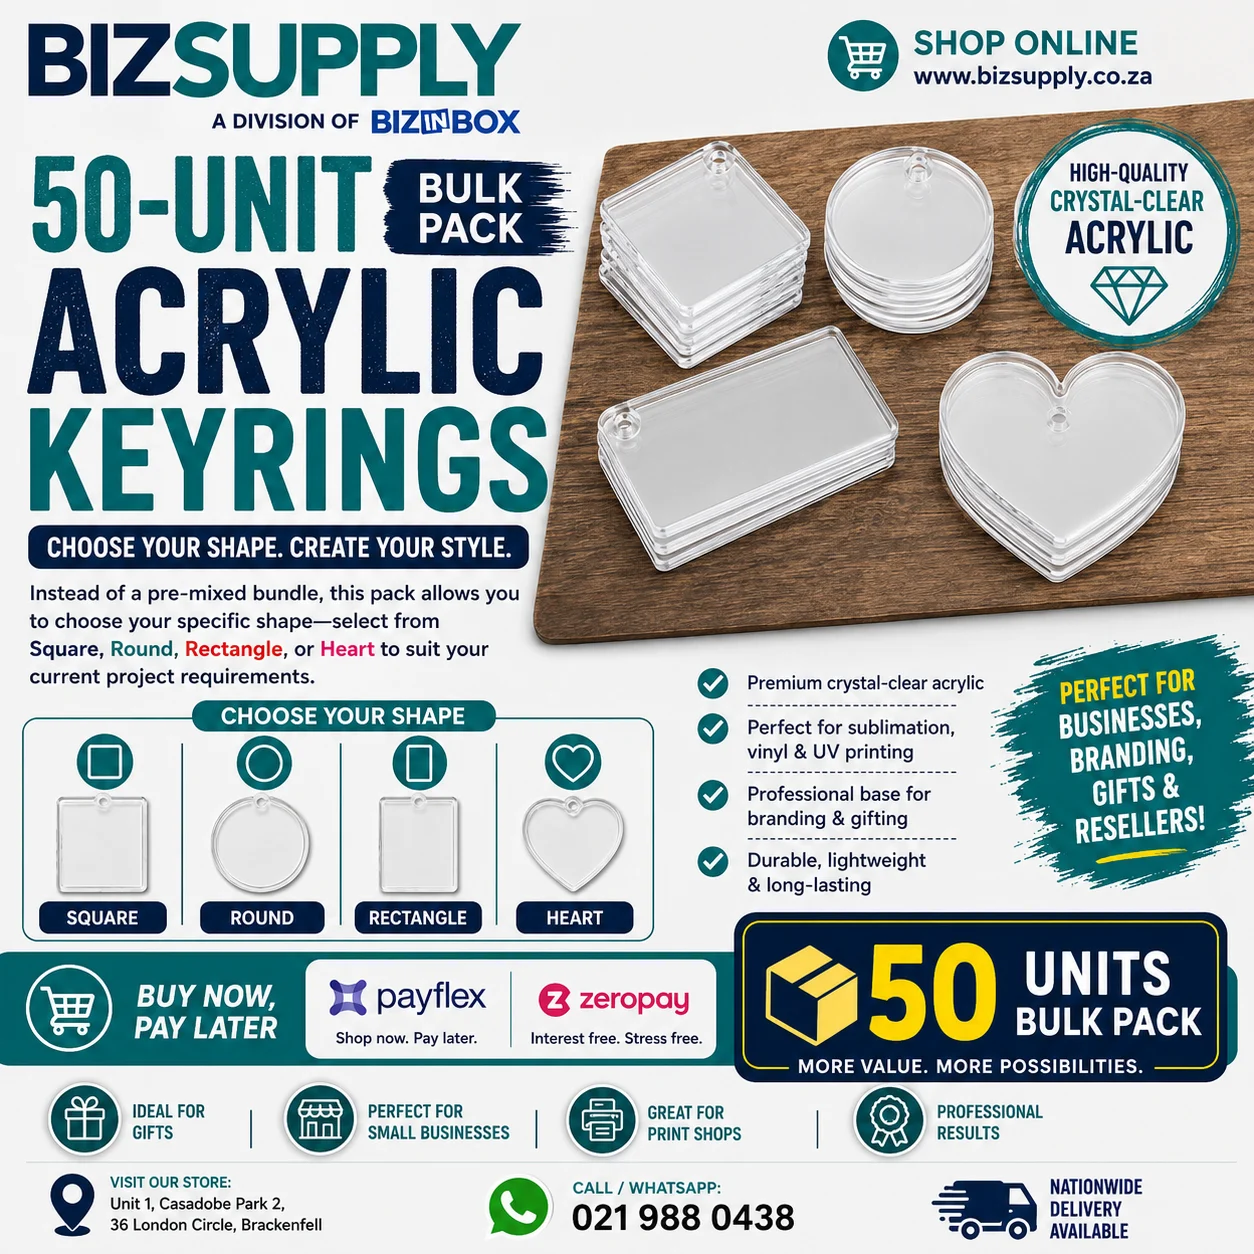
Consistency is key when fulfilling large orders. Whether you are branding a batch of wedding favors or corporate luggage tags, this bulk pack ensures you have 50 identical, high-quality blanks to work with. These clear acrylic keyrings are a favorite for South African creators using vinyl cutters, UV printers, or sublimation printing, offering a high-profit margin with minimal effort.
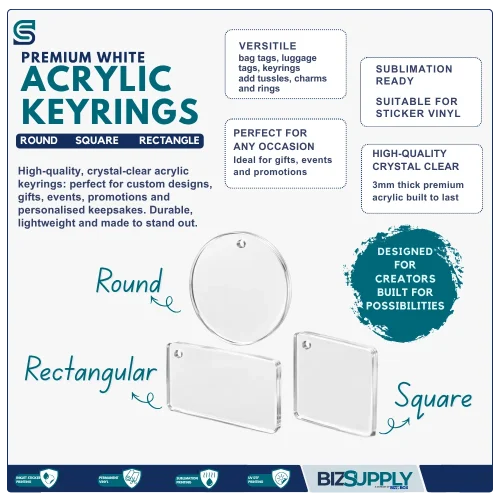
Available Shapes (Choose One per Pack):
-
Square: A modern, symmetrical look perfect for geometric logos and QR codes.
-
Round: The classic choice for circular emblems, emojis, and name initials.
-
Rectangle: Ideal for full names, contact details, or landscape-oriented photos.
-
Heart: The top seller for Valentine’s Day, weddings, and personalized sentimental gifts.
Key Features:
-
Premium Clarity: High-grade acrylic that offers a glass-like finish without the fragility.
-
Scratch Protection: Every blank is shipped with a protective film on both sides to ensure it arrives in pristine condition.
-
Durable & Lightweight: Designed to handle daily use while remaining light enough for easy shipping to your customers.
-
Vinyl Friendly: The smooth, non-porous surface is perfect for both adhesive vinyl and Heat Transfer Vinyl (HTV) applications and Sublimation Printing.
Ideal Applications:
-
Custom School Bag Tags: Durable and easy to personalize with kids’ names using bright vinyl.
-
Small Business Branding: Create professional promotional items by adding your logo to a rectangle or round blank.
-
Special Event Favors: Use the heart shapes for personalized wedding or baby shower keepsakes.
-
Souvenir Merchandising: Design and sell your own local or artistic keyring collections.
Bulk Acrylic Keyring Pack – 50 Units (Choose Your Shape)
Stock up on exactly what you need with our 50-Unit Bulk Acrylic Keyring Pack. Instead of a pre-mixed bundle, this pack allows you to choose your specific shape—select from Square, Round, Rectangle, or Heart to suit your current project requirements. Each keyring is crafted from high-quality, crystal-clear acrylic, providing a professional base for branding and gifting. Buy now and pay later with Payflex or ZeroPay to manage your stock interes
R250,00
 Delivery
Choose to Door , to Locker or In-Store collection
Delivery
Choose to Door , to Locker or In-Store collection
 Reliable Products
All our products are tested.
Reliable Products
All our products are tested.
 Local Support
Our support team are on WhatsApp
Local Support
Our support team are on WhatsApp
 Secure Payment
Payment with secure gateways
Secure Payment
Payment with secure gateways
Frequently bought together
Total for selected items R250,00
1. Specifications Acrylic
Acrylic Specifications
- Product Type: Sublimation Acrylic Substrate / Clear Signage Blank
- Material Thickness: 3mm (Rigid cast layout)
- Base Color: 100% Optically Clear / Transparent or Solid Opaque White
- Surface Finish: High-Gloss Smooth Polymer Layer
Frequently asked questions – Sublimation Printing on Acrylic
Must I remove the protective plastic?
Yes. Remove the protective plastic from both sides before pressing. Pressing with the plastic attached can damage the item and spoil the image.
Must I mirror my design?
For white acrylic, mirror the design before printing. For clear acrylic printed from the back and viewed through the front, do not mirror it. Always test text or a directional image before producing multiple items.
Why print on the back of clear acrylic?
The design is protected behind the acrylic and has an attractive glossy appearance when viewed through the front.
Can I press both sides?
Yes, but complete and cool one side fully before preparing the second side. Test first to confirm that reheating does not affect the first image.
2. Printing Instructions – Acrylics
Sublimation Printing
Settings:
Temperature: 170 °C
Time: 160 seconds
Pressure: Light
Both sides can be sublimated.
Important: Remove the protective plastic from both sides before pressing.
- Remove all protective plastic from both sides of the acrylic.
- Make sure the acrylic is clean, dry and free from dust.
- Mirror the design before printing, especially words, numbers and directional images.
- Print the mirrored design onto sublimation paper.
- Place the printed side of the paper against the side of the acrylic you want to decorate.
- Secure the paper with heat-resistant tape so it cannot move.
- Place clean protective paper above and below the acrylic.
- Press at 170 °C for 160 seconds using light pressure.
- Open the press carefully and remove the transfer paper without sliding it.
- Immediately place the acrylic on a clean, flat surface.
- Keep it flat under light, even pressure until completely cool. This helps prevent warping.
CAUTION
The acrylic will be hot and may be slightly flexible when it leaves the press. Handle it carefully and do not bend it.
CLEAR ACRYLIC
TIP FOR BRIGHTER COLOURS
Printing on the back will give the image dept. Remember not to mirror the image when printing.
After the acrylic has cooled completely, apply white sticker vinyl to the back, behind the sublimated image. The white backing makes the colours appear brighter and clearer when viewed through the front.
SUCCESS CHECK
The image reads correctly from the front, the colours are clear, and the acrylic remains flat.
Vinyl Application on Acrylics
- Remove the protective film from both sides of the acrylic.
- Clean the surface with a soft, lint-free cloth and make sure it is completely dry.
- Place transfer tape over the vinyl design and rub firmly across the entire design.
- Turn the design over and slowly remove the paper backing. The vinyl should remain attached to the transfer tape.
- Position the design carefully without touching the exposed adhesive.
- Lower it onto the acrylic from one side to the other, smoothing as you go.
- Rub firmly over the complete design.
- Slowly remove the transfer tape at a low angle.
- Press down any lifted edges and allow the vinyl adhesive to settle.
APPLYING TO THE BACK OF CLEAR ACRYLIC
Applying vinyl to the back helps protect the design while allowing it to show through the clear acrylic.
Important: The design must have been mirrored before cutting—especially words, numbers and directional images.
Apply the vinyl to the back surface using the same steps above. Turn the acrylic over and check that the design reads correctly from the front.
Important: Apply the design to the front of white acrylic. Do not mirror the design.
SUCCESS CHECK
The design is straight, smooth and firmly attached, with no lifted edges or trapped dust.